
When your AES is completed, you are ready to save, transmit your AES to customs, and print the associated documents. This section explains the process of completing your AES transaction.
Once you’ve completed all of the information on the AES main screen, you want to click File, Save to save the AES information.
If you would like to save this AES as complete, check the box on this Save Options screen

This will automatically open the validation screen, to validate your AES transaction
Once you are back on the transaction screen, click on AES and Transmit AES

If your transmission is successful and error-free, you will receive the following message:

You can review your transmissions, and check the status of your AES transmissions by clicking on the Transmission History tab located on the AES transaction screen.

You may receive reject/warning messages if your AES is not error free. The transaction page will display “Rejected” or “Accepted With Warnings”
The transmission history page will display details on this warning/reject
Correct these errors and re-transmit to get your AES accepted error free
To print any documents associated with this AES transaction, click File and Print
Then select the document that you’d like to print (SED, BOL, AWB, etc.)

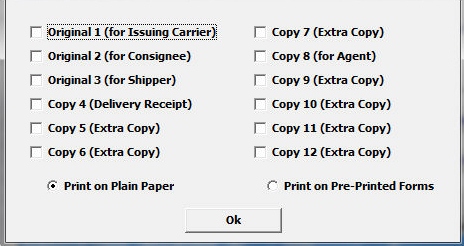
***Below is a new feature from Release 1103 : There are now 12 copy options for the AWB (Master or House) Printouts. In order to use this feature, please submit a ticket to our Support Center to activate default setting : RPT_AWB_ShowOpts

For information on adding data to these documents, see the Additional AES information section of this manual.