
Click the Manifest (AMS) link on the SmartBorder Main Page:
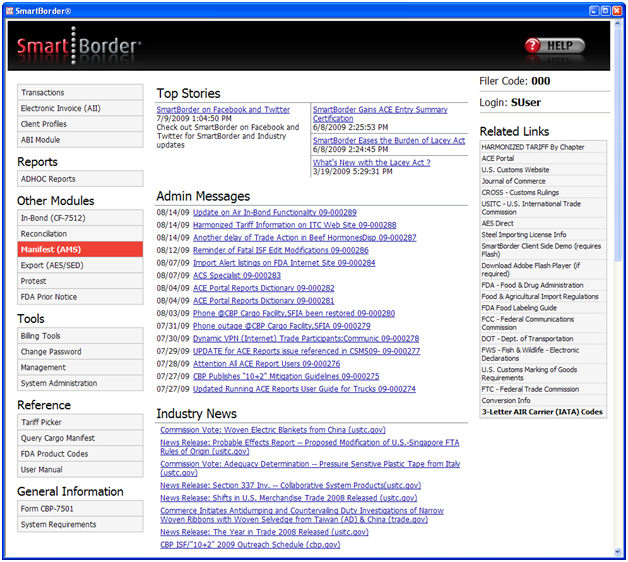
You’ll want to begin by getting familiar with the menu options on the main screen of the Automated Manifest System module. Once you’ve created your manifest, you will return to this transaction screen to perform the transmissions associated with the AMS transaction. Completing your AMS transaction may require that you review some other portions of this manual, in order to become familiar with other modules of SmartBorder (ex. Billing).
|
Menu Option |
Description |
|
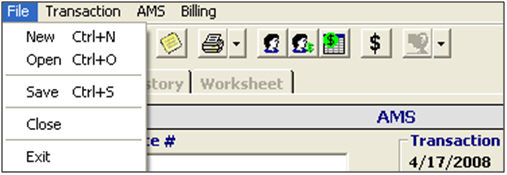
File - New |
Create a new AMS transaction. |
|
File - Open |
Open a saved AMS transaction. This will open the AMS transaction grid, where you can search for the desired transaction. |
|
File - Save |
Save the current AMS transaction. |
|
File - Close |
Close the current AMS transaction. This will not close the AMS module. |
|
File - Exit |
Close the current AMS transaction, and exit the AMS module. |
|
Menu Option |
Description |
|
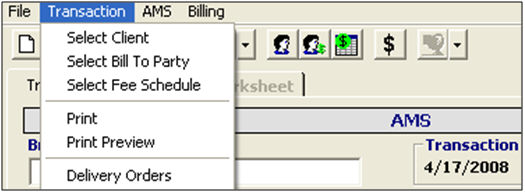
Transaction - Select Client |
Open the client pick-list, which will allow you to search for and select the client for this AMS transaction. You can also do this by clicking the ellipsis in the client field. |
|
Transaction - Select Bill To Party |
Open the client pick-list, which will allow you to search for and select the bill-to party for this AMS transaction. You can also do this by clicking the ellipsis in the bill to party field. |
|
Transaction - Select Fee Schedule |
Open the fee schedule pick-list, which will allow you to search for and select the fee schedule for this AMS transaction. You can also do this by clicking the ellipsis in the fee schedule field. |
|
Transaction - Print/ Print Preview |
Print the transaction report for the current AMS transaction. Click Print Preview to view this report on your screen. |
|
Transaction - Delivery Orders |
Open the Delivery Orders for this AMS transaction. See the Delivery Orders section of this manual for further details on how to create and manage your delivery orders. |
|
Menu Option |
Description |
|
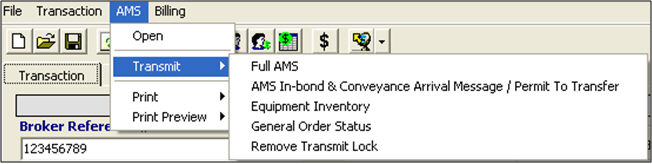
AMS - Open |
Open the AMS Manifest screen. You can also do this by clicking the Open AMS button on the transaction screen. |
|
AMS - Transmit |
Transmit the completed AMS to customs. This menu also allows you to perform the other AMS related transmissions. (ex. Equipment inventory, General Order status, etc.) |
|
AMS - Remove Transmit Lock |
Use this option to unlock an AMS transmission. If your AMS transaction is stuck in "Pending" or "Wait" status, you can use this feature to unlock the transmission. This will allow you to make the necessary corrections to the AMS and re-transmit. |
|
AMS - Print/Print Preview |
Print the customs forms for the AMS. Click print preview to view the completed form on your screen. |
|
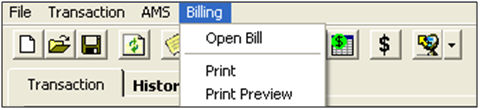
Menu Option |
Description |
|
Billing - Open Bill |
Click to open the bill for this AMS transaction. For more details on billings in SmartBorder, please review the section of this manual on Billings. |
|
Billing - Print/Print Preview |
Print the bill for the current AMS transaction. Click print preview to view this bill on your screen. |
|
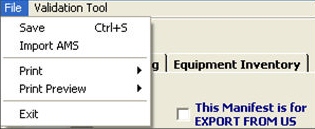
Menu Option |
Description |
|
File - Save |
Save the current AMS Manifest. |
|
File - Import AMS |
Use this to import data from another AMS. This is the same function that is performed automatically when you first open the AMS screen. |
|
File - Print/Print Preview |
These menu options are used to print, or print preview, the documents associated with this AMS. (CBP Form 1302 + 1302A) |
|
File - Exit |
Click to exit the AMS Manifest screen, without saving. |
|
Validation Tool |
Open the validation screen, and validate that your AMS is free of errors, prior to transmitting your AMS manifest. These validations also run automatically upon saving your AMS. |
![]()
|
Menu Option |
Description |
|
Manifest |
This section is where the port information, carrier information, and ETA information is entered. This is also where in-bond information is entered (when necessary). |
|
Bills of Lading |
This tab is where you enter the bill(s) of lading for this AMS transaction. |
|
Equipment Inventory |
This tab is where the container/seal information is entered for this AMS transaction. |
Now that you're familiar with the basics of the AMS module, you're ready to begin Creating an AMS Transaction